Guides to shower door seal types, profile applications, magnetic seals, bottom seals, bath screen seals and related enclosure configurations.

8 Types of Shower Door Seals and Where They Fit

Last updated: October 2026

The main types of shower door seals are bottom sweeps, drip deflectors, hinge-side seals, non-magnetic closing seals, magnetic closing pairs, sliding-door overlap seals, bifold connecting seals and frame or glazing inserts. Each sits in a different position and solves a different leak, so start by identifying where the water escapes.
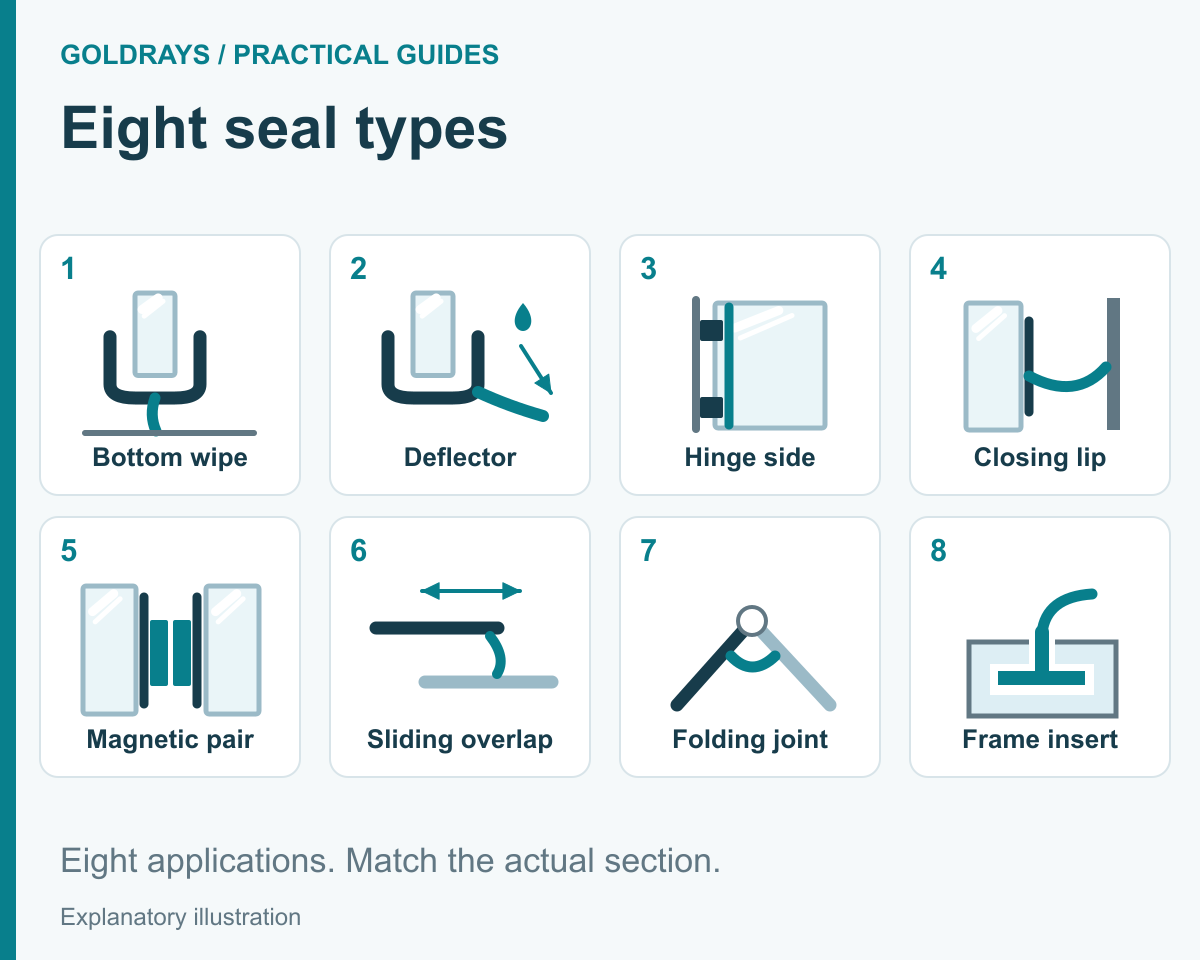
Eight illustrated shower-seal functions around different enclosure arrangements.

The 8 types at a glance

# Type Where it sits Stops
1 Bottom sweep (wipe) Lower edge of a moving door Water under the door
2 Drip deflector (drip rail) Lower edge, inside face Runoff from the glass reaching the floor
3 Hinge-side seal Edge next to the hinge or pivot Spray through the gap at the wall or panel
4 Non-magnetic closing seal Closing edge Gap where the door meets a panel or wall
5 Magnetic closing pair Closing edge and the panel or wall it meets Gap at the closing edge; holds the door shut
6 Sliding overlap seal Where sliding panels pass Splash between overlapping panels
7 Bifold connecting seal Joint between folding panels Water through the fold
8 Frame insert / glazing seal Inside an aluminium channel Water between glass and frame

Follow the water path first

Water does three things on a shower door: it runs down the glass, it hits vertical joints, and it collects at the bottom. Each seal type deals with one of those paths. Before choosing a seal, run the shower and look for where water first appears outside, not where the puddle ends up. That point tells you which of the eight positions to fix.

1. Bottom sweep

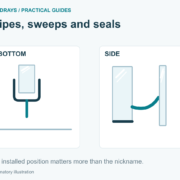
A flexible fin along the lower edge of a moving door that closes the gap to the tray or floor. Check the gap at both ends and the middle, then open and close the door: a fin that is too long drags or folds over. See the bottom-seal guide.

2. Drip deflector
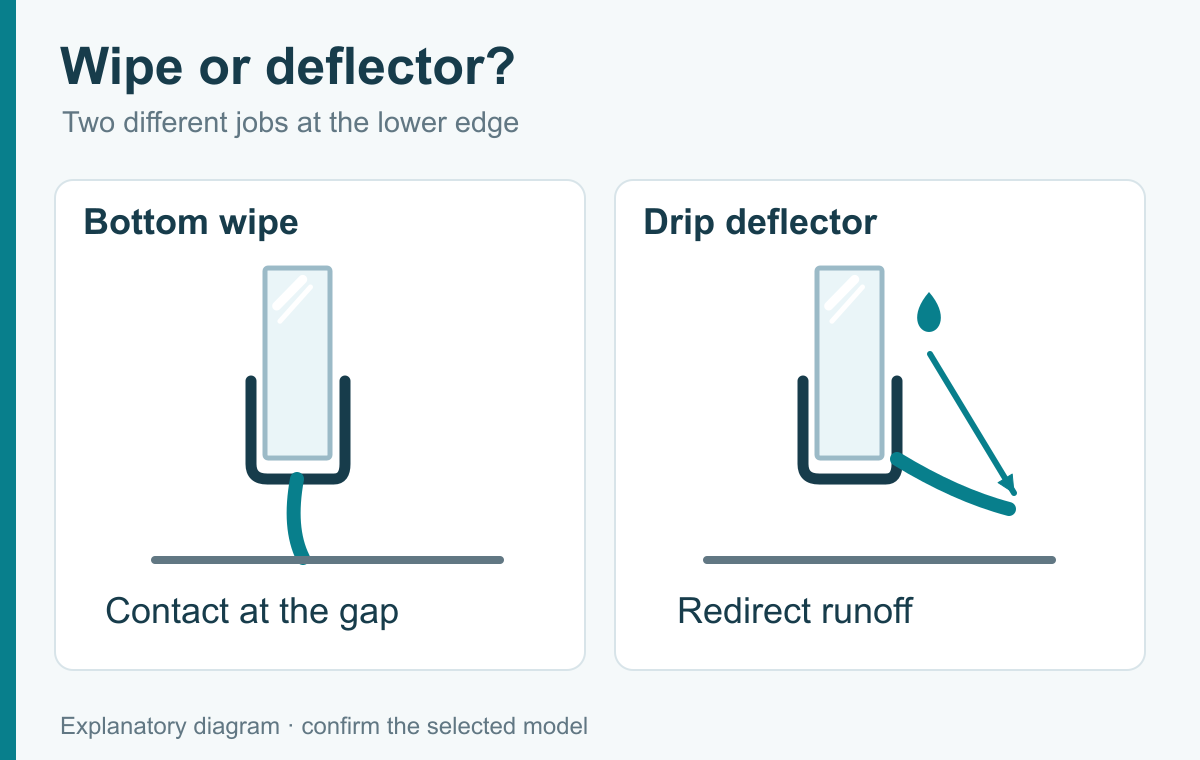
Difference between a contacting bottom wipe and a runoff deflector.

An angled section on the inside face that turns water running down the glass back into the shower. It often shares a profile with a sweep, but a deflector alone does not close the gap under the door. DreamLine’s glossary distinguishes the two functions.

3. Hinge-side seal

Works beside the hinged or pivoting edge, where the gap changes as the door turns. Identify the wall, glass or frame it meets, and check it clears the hinges through the full swing. Leaks here are a very common complaint on bath screens: see why shower screens leak at the hinge.

4. Non-magnetic closing seal

A lip or bulb that touches the adjacent surface as the door closes. Check the gap at several heights, and make sure contact doesn’t hold the door open short of its closed position.

5. Magnetic closing pair

Two magnetic strips, one on the door and one on the panel or wall profile, that pull the door closed. Choose by angle (90°, 135° or 180°) and glass thickness, and replace both halves together. See the magnetic seal guide.

6. Sliding overlap seal
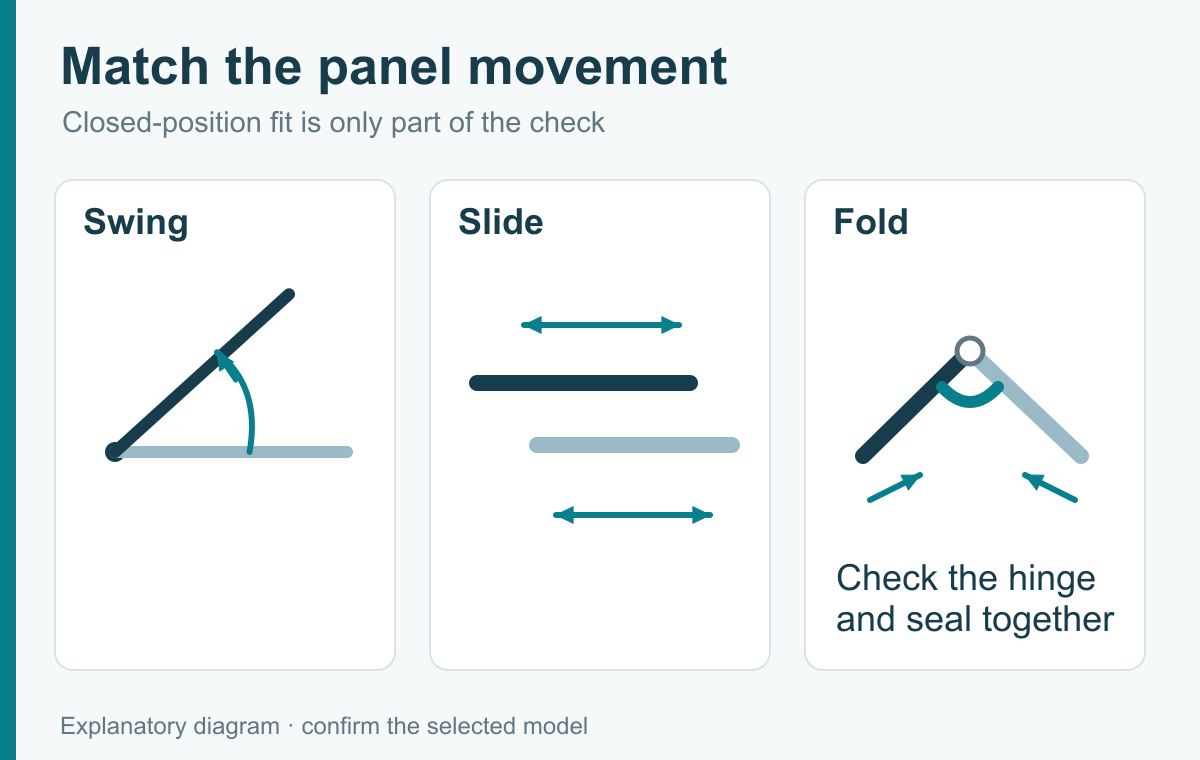
Different movement paths for swinging, sliding and folding panels.

Controls splash where sliding panels pass one another. Check the overlap and clearance with the doors open and closed, and that the seal clears the other panel, handles and guides.

7. Bifold connecting seal

A flexible bridge at the folding joint between panels. Match the panel gap, hinge geometry and folding direction; the seal does not replace a structural hinge.

8. Frame insert or glazing seal

Fits a retaining channel in a framed enclosure. Its ribs and base differ from a push-on glass seal, as the REHAU profile catalogue illustrates. Use the enclosure’s part reference, and have an installer check before disturbing a seal that helps hold glass in place.

A seal strip is not sealant

Seals are shaped strips that grip the glass or fit a channel, and they can move with the door. Sealant (silicone) cures in fixed joints only. Putting sealant where the maker doesn’t specify it can cause leaks rather than stop them; KOHLER’s pivot-door manual is one example that warns against it. As a rule, silicone goes on the outside of a shower frame, never across a moving edge.

Turn the type into a specification

Mark each position on a photo of the whole door. For each one, record: the glass thickness or channel it fits, the gap it must close, the length, how the door moves, and a photo of the seal’s cut end. Curve, material and finish come after those fit details. Compare the result with our size chart or the standard seal range.

Trade buyers: GoldRays makes bottom, hinge-side, closing, magnetic, sliding and bifold door seals and glass-to-glass connectors for 4 to 15 mm glass. Request samples.

Frequently asked questions

What is the most common type of shower door seal?

The bottom seal, usually a sweep combined with a drip deflector. It is also the one replaced most often.

What is the difference between a sweep and a drip rail?

A sweep closes the gap under the door; a drip rail turns water running down the glass back inside. Many bottom seals combine both.

Which seal stops a leak at the side of a shower door?

A hinge-side seal at the hinge edge, or a closing seal (soft or magnetic) at the opening edge, depending on which side leaks.

About the author

GoldRays technical team

The GoldRays technical team writes these guides at the GoldRays factory in Foshan, China, where clear PVC and polycarbonate shower door seals have been made since 2001. The team works with more than 40 production lines and more than 3,200 moulds for 4 to 15 mm glass, and answers trade questions about fit, materials and testing.
Ask the technical team

Which Shower Seal Should I Buy? Start with the Position and Fit

Last updated: October 2026

Choosing a shower seal

Start with where the seal fits. Then match its fixing, shape and measurements to your door.

Find your seal type ↓
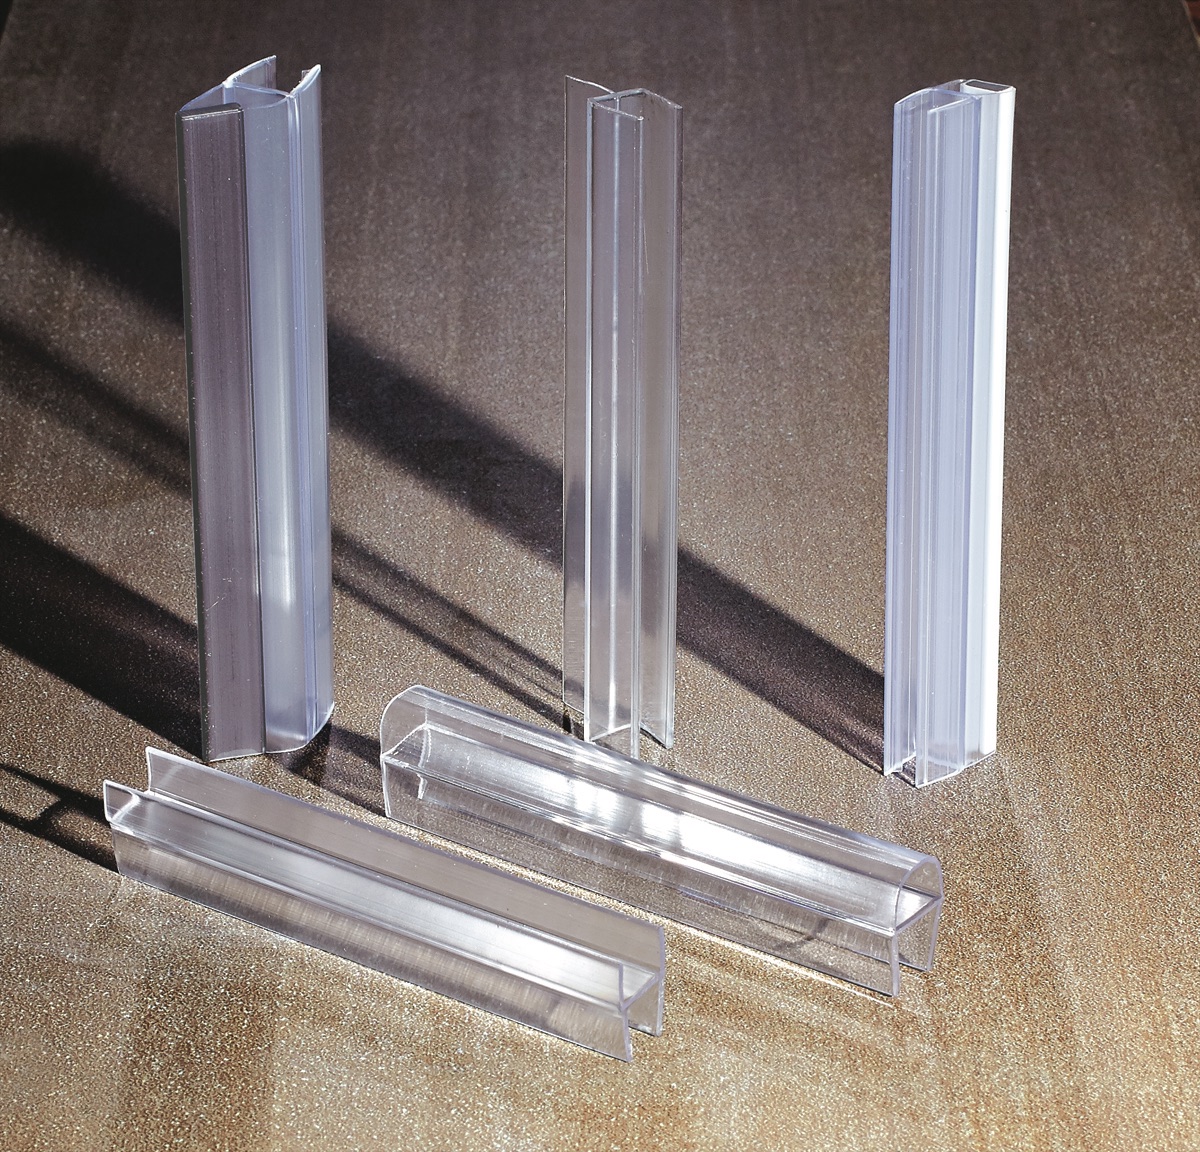
Five real GoldRays clear seal samples with different channels and flexible edges
Different sections do different jobs. A similar colour or outline does not make them interchangeable.

Watch the movement · step by step

How a clip-on seal grips the glass

Watch the channel meet the glass edge, then see the seated end section.

BOTTOM CLIP-ON EXAMPLEGlass panelEND VIEWChannel around glassThe flexible edge extends below the channel.Original explanatory animation · schematic, not to scale

STEP 01 / 03

See the glass channel

The channel goes around the bare glass edge. This is a bottom clip-on example.

Watch source: Uniblade · 0:41–0:54 ↗

0 / 15 sec

Based on Inventive Creations’ Uniblade demonstration, 0:41–0:54. This is a bottom-seal example. Match your own part’s fixing and specified glass size.

01 · Look at the door

Where does the old seal sit?

Bottom edge

Under the door

Look for a bottom sweep or water deflector. Match the glass channel and the space below the door; check that the flexible edge can pass the tray or threshold.

Side contact

Along a side edge

Look for a side or contact seal. Compare the lip’s direction and reach, and show which surface it touches when the door closes.

Magnetic meeting edge

Where two magnets meet

Identify both mating parts. Show the closed panels and how the door moves. Use the magnetic seal guide to check the pair.

Location illustrations only. A sealant bead at a fixed joint is a separate repair.

02 · Look at the fixing

Does it clip on or fit in a groove?

A clip-on section grips the glass edge. An insert slides into a retaining groove. An adhesive-backed design attaches to a surface.

Photograph the old seal’s end section and its mounting point. For an insert, include the retaining base; for curved glass, show the curve. Start with the enclosure maker and original part number when available.

Clip-onRetained insertAdhesive-backedMatch the fixing
Match the fixing as well as the exposed flexible edge.

03 · Take three measurements

Thickness, working gap and length

Bare glass edge

Glass thickness

Use the original specification or measure an accessible bare edge. Do not measure over the old plastic channel.

Measure the gap

Working gap

Measure the space the seal must bridge at several points. Record which surfaces you measured between and whether the old seal was fitted.

Record each length

Required length

Mark the start and end of each strip. Two mating magnetic strips may need different lengths.

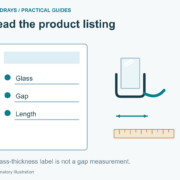
An “8 mm glass” label describes the mounting size. It does not mean the seal will bridge an 8 mm gap.

Before you order

Compare the dimensioned end drawing with your old part. Confirm supplied length, permitted trimming and whether the pack contains one strip, both magnetic halves or an insert only. Check sample or return terms before cutting.

For a single replacement, start with the enclosure maker or a spare-parts retailer. For a trade order, send GoldRays the photos, measurements, required lengths and quantity.

Explore magnetic seal arrangements →
References used for this guide

Shower Seal UK: identification and fitting help · DreamLine: enclosure terminology · MCOCOD: replacement measurements.

About the author

GoldRays technical team

The GoldRays technical team writes these guides at the GoldRays factory in Foshan, China, where clear PVC and polycarbonate shower door seals have been made since 2001. The team works with more than 40 production lines and more than 3,200 moulds for 4 to 15 mm glass, and answers trade questions about fit, materials and testing.

Ask the technical team

Shower Door and Seal Reading Guide: Find the Right Help

Last updated: October 2026

Start with the problem, then choose one guide. This page connects shower-door and seal questions with practical reading and selected manufacturer resources.

Read more

Shower Door Wipes and Seals: Identify the Part You Need

Last updated: October 2026

In shower-door hardware, a wipe is a sealing part, not a cleaning cloth. Its position and end shape tell a supplier more than the product name alone.

Read more

Bath Screen Seal Manufacturer and Supplier in China

Last updated: October 2026

GoldRays supplies bath-screen sealing profiles for enclosure brands, importers, distributors and project buyers. A useful enquiry starts with the screen and the required fit, rather than a similar-looking strip.

Read more

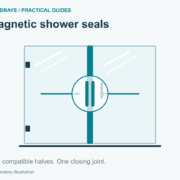
Magnetic Shower Seals: A Practical Buyer’s Guide

Last updated: October 2026

Magnetic shower seals

A magnetic closure depends on two matching faces meeting along the door. Check the pair, its position and the door’s movement before ordering.

Compare the arrangements ↓
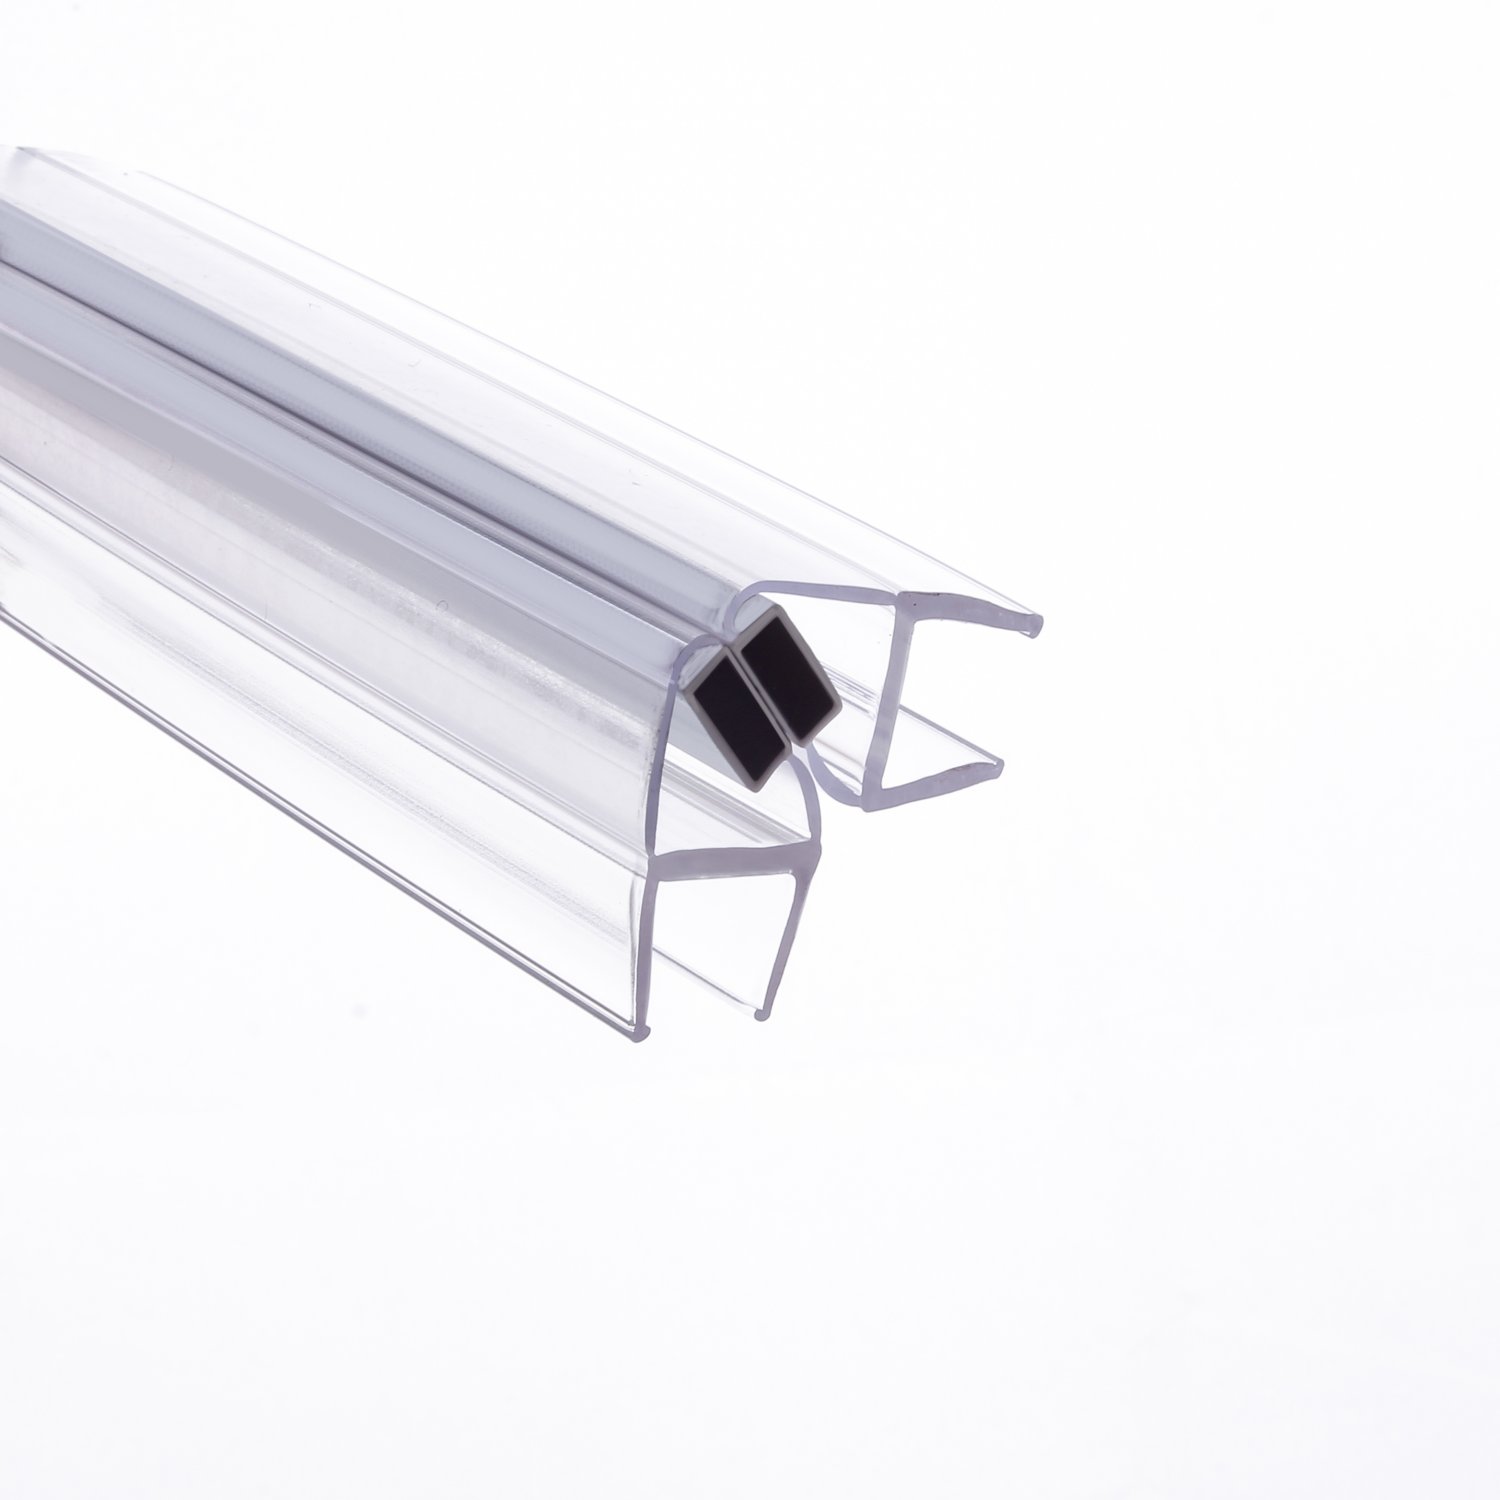
GoldRays S008A1W magnetic seal pair showing clear glass channels and dark mating faces
Real product example: S008A1W. The clear channels grip the glass; the dark faces form the magnetic closure.

Watch the movement · step by step

Two sides. One matched pair.

See the first profile seat, then the other. The inset makes the mating faces easier to see.

A CLIP-ON MAGNETIC PAIRGlass AGlass BFINISHED PAIRThe two mating facesSeat progressively. Keep each profile on its intended side.Original explanatory animation · schematic, not to scale

STEP 01 / 04

Start with one end

Engage one end first, as shown in the source video.

Watch source: SIMBA SEALS · 0:25–0:34 ↗

0 / 24 sec

Based on SIMBA SEALS’ magnetic fitting demonstration, 0:25–1:25. Generic clip-on profiles are drawn; this is not an S008A1W-specific installation test.

01 · Show how the door closes

Which arrangement looks like yours?

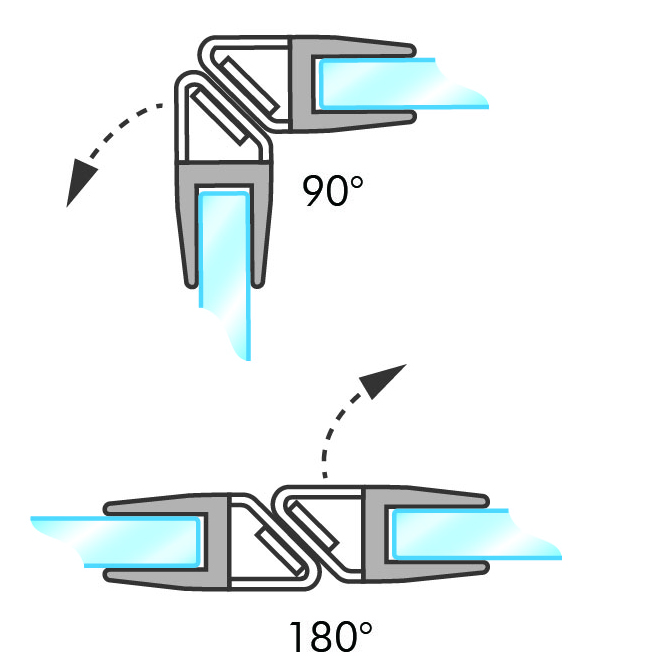
GoldRays S008A1W drawing showing 90-degree and 180-degree closed-panel arrangements

Straight or right-angle

The S008A1W drawing illustrates 180° and 90° arrangements. Its published glass options are 6, 8 and 10 mm.

View this example →
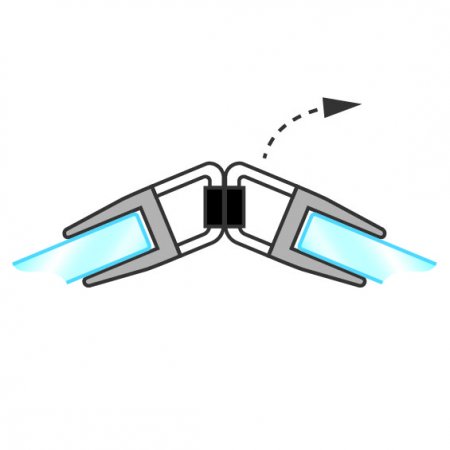
GoldRays 008C1 drawing of an angled magnetic closure with a door movement arrow

Angled meeting edges

The 008C1 reference shows a 135° closure. Compare the two sections and the movement shown in the drawing.

View this example →
GoldRays 008B drawing showing the sliding-door closure arrangement

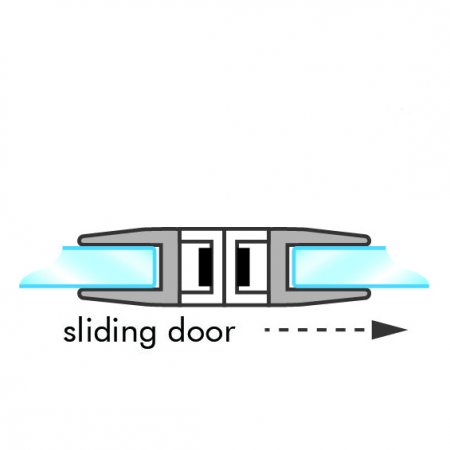
Sliding closure

The 008B reference illustrates a sliding arrangement. Identify the moving panel and the opposing part.

View this example →

These are reference examples, not automatic replacements. Angle labels must be read with the supplier’s drawing; they do not describe every permitted door movement.

02 · Observe the existing joint

What happens when you close the door?

Even contact

The faces meet evenly

Keep a record of both original parts and their orientation. If a strip is damaged, use that information to identify the replacement.

Changing gap

Only one end meets

Check profile seating and record the changing gap. Door alignment may need an installer’s attention; a stronger magnet does not correct the geometry.

Pairing or interference?

They repel or spring apart

Confirm the part codes and orientation, then look for interference at the bottom. Do not reverse an embedded magnet unless that model’s instructions allow it.

03 · Identify both halves

Send a small, useful set of details

  • A whole-door photo, with the moving panel identified.
  • End views of both old profiles and any original part codes.
  • Glass thickness, closed gap at top/middle/bottom, and each required length.
  • A top-view sketch showing the closed panels and opening direction.

State whether the old profiles were fitted during measurement. The seal selection guide explains the basic dimensions.

Side ASide BWhole doorKeep the pair identified
Keep each profile linked to the side of the door it came from.

One replacement strip or a complete pair?

A confirmed original spare can replace one side. If the retained half cannot be identified, ask the supplier to confirm a pair for the complete installation. Check exactly what the pack includes.

For trade approval, check full-length samples in the intended enclosure. A short offcut helps identify a section but cannot demonstrate full-height contact or door travel.

Ready to fit? See the replacement sequence →
References used for this guide

GoldRays S008A1W drawing and dimensions · GoldRays 008B and 008C1 references · KOHLER 1548083-2-A, pages 29–30 and 33 · Shower Seal Ltd: an example of pair and pack information.

About the author

GoldRays technical team

The GoldRays technical team writes these guides at the GoldRays factory in Foshan, China, where clear PVC and polycarbonate shower door seals have been made since 2001. The team works with more than 40 production lines and more than 3,200 moulds for 4 to 15 mm glass, and answers trade questions about fit, materials and testing.
Ask the technical team

Shower Door Lip Seals: What They Are and How to Choose

Last updated: October 2026

A shower-door lip seal has a flexible fin or flap that helps manage water at a defined gap. “Lip” describes part of its shape or function, not a complete replacement specification.

Read more

Shower Door Seals Explained: How the Parts Work Together

Last updated: October 2026

Shower door seals help control water at selected edges and moving joints. They work with the door, hardware, tray and drainage features, so replacing a strip will not necessarily fix a leak that starts elsewhere.

Read more

Sealing Strips for Shower Doors: How to Read a Product Listing

Last updated: October 2026

Two listings can both say “clear shower door seal” yet describe different parts. Read the description as a specification: where it fits, what it does and exactly what arrives in the pack.

Read more

Shower Door Bottom Seals and Sweeps

Last updated: October 2026

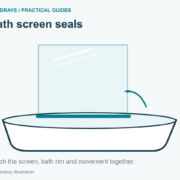
A shower door bottom seal clips onto the lower edge of the glass and stops water escaping under the door. Most combine a soft sweep (a fin that brushes the tray or floor) with a drip rail (a deflector that sends water running down the glass back into the shower). Choose one by glass thickness, the gap under the door, and whether the door swings or slides.

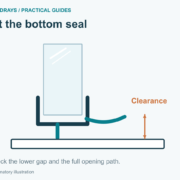
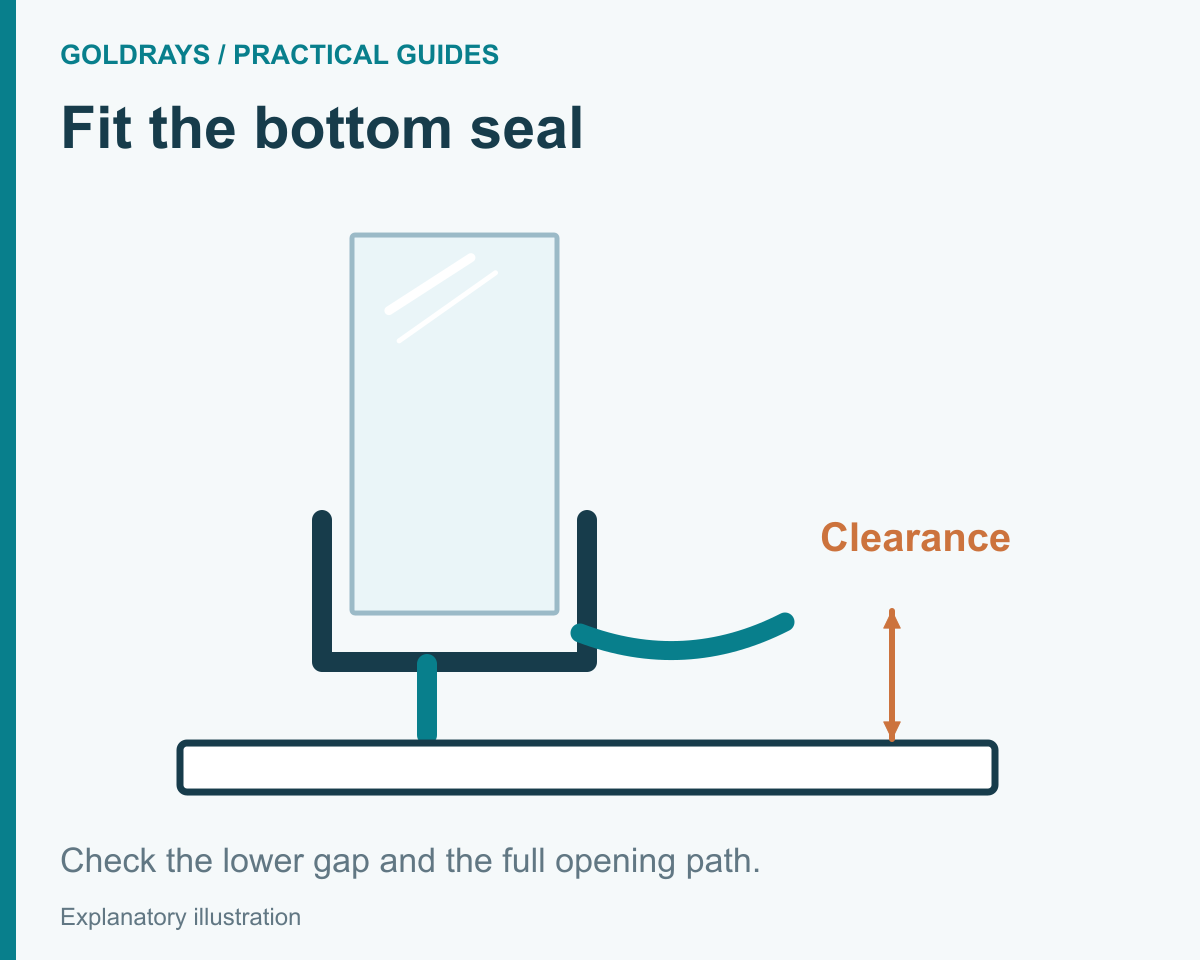
Side view of a bottom seal with the lower clearance highlighted.

Types of bottom seal

Type What it does Best for
Sweep with drip rail Fin closes the gap; deflector turns water back inside Hinged and pivot doors over a tray or level floor
Bubble (bulb) seal A hollow bulb compresses against the floor Uneven floors and wider gaps
Double fin Two fins for an extra barrier Doors facing the shower head directly
Low-friction sweep Short, smooth fin Sliding doors and doors that drag
Drip rail only Deflector without a fin Doors over a raised threshold or upstand

GoldRays’ bottom seal range covers the common glass thicknesses from 6 to 12 mm, plus profiles for thinner bath-screen glass.

How to measure

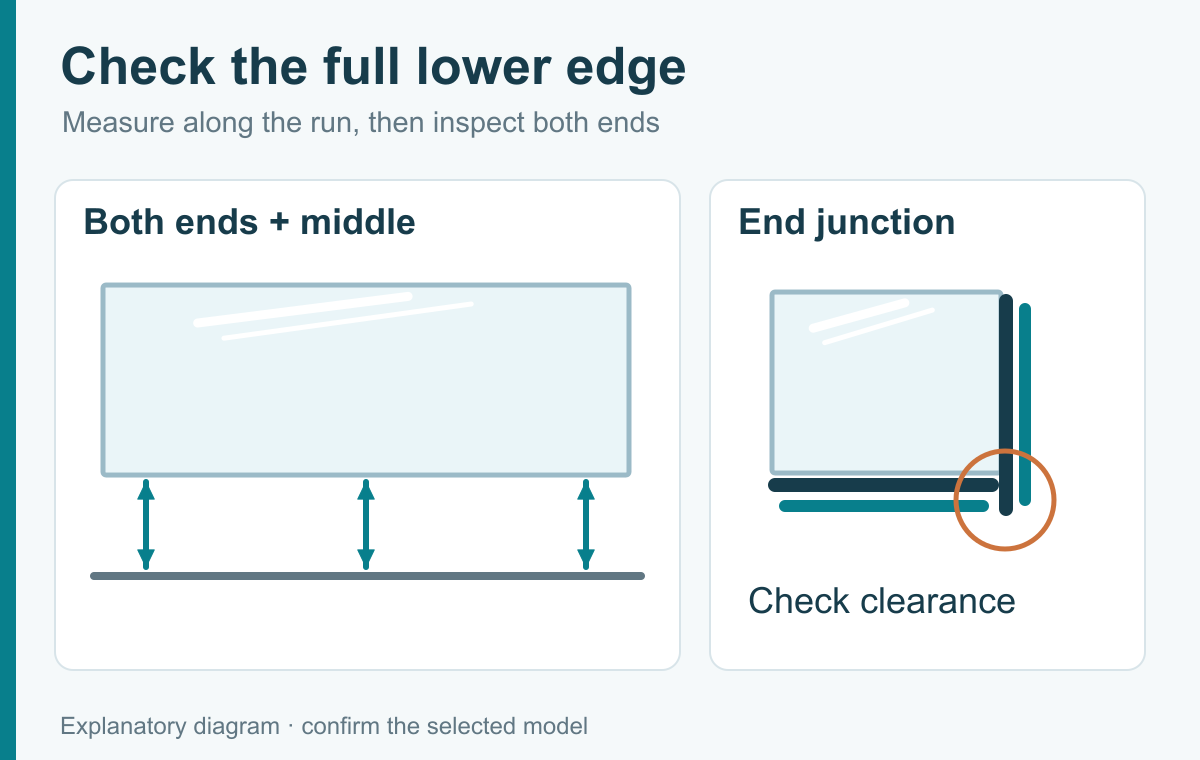
Three bottom-gap measuring positions and the junction with a vertical seal.

  1. Glass thickness at the bottom edge: commonly 6, 8 or 10 mm.
  2. Gap between the bottom of the glass and the tray or floor, at both ends and in the middle. Use the largest reading.
  3. Door movement: swing direction (inward or outward) and whether it passes over a threshold.
  4. Length: the full width of the glass edge.

See the full measuring guide and the size chart.

How to fit it so it doesn’t leak

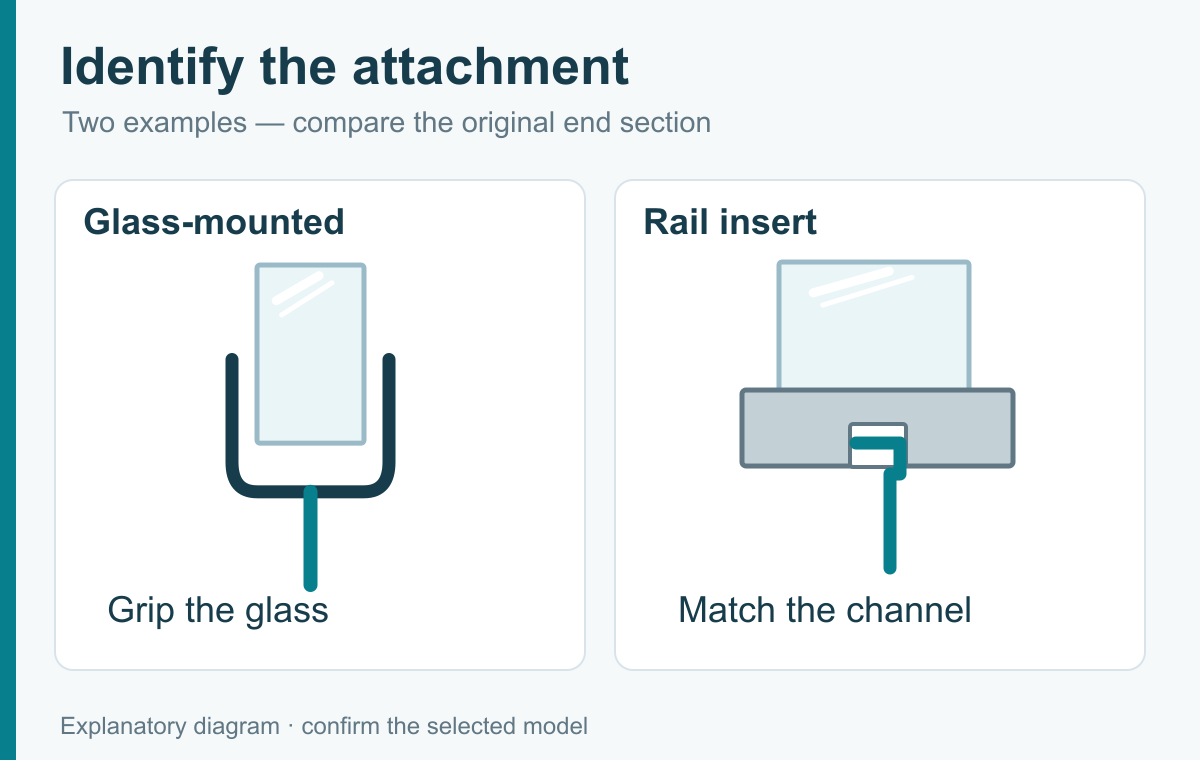
Different attachment methods for a push-on glass seal and a rail insert.

  1. Remove the old seal and clean the glass edge (a little diluted alcohol removes soap film).
  2. Push the new seal on loosely, with the drip rail facing into the shower.
  3. Close the door and check the fin touches the floor along its length without forcing the door open.
  4. Mark and trim flush with the hinge-side edge. Stopping short of the edge is the commonest cause of corner leaks.
  5. Push the seal fully home and run water at the bottom corners to check.

Clean, adjust or replace?

You see Likely cause Action
Dirty or stained, but soft and intact Soap scum, limescale Clean with mild soap; diluted vinegar for limescale
Door drags on the seal Door has dropped, or the fin is too long Tighten or adjust the hinges; trim or choose a shorter fin
Water at one corner Seal stops short, or doesn’t meet the side seal Refit or replace so it runs edge to edge
Split, hard or yellow fin Worn material Replace
Water along the whole length Wrong gap size, or drip rail facing out Fit the correct size with the deflector facing in

Trade buyers: request free samples of any bottom seal model. Minimum order is 500 m per model as a guide; smaller runs are possible.

Frequently asked questions

Which way does the drip rail face?

Into the shower. The angled deflector catches water running down the glass and turns it back inside.

Why does my new bottom seal still leak?

Usually the seal is for the right glass thickness but the wrong gap, it was trimmed short of the hinge edge, or the deflector faces outward.

Do frameless shower doors need a bottom seal?

Almost always, unless the door closes over a raised upstand that contains the water. Without one, water runs under the door.

About the author

GoldRays technical team

The GoldRays technical team writes these guides at the GoldRays factory in Foshan, China, where clear PVC and polycarbonate shower door seals have been made since 2001. The team works with more than 40 production lines and more than 3,200 moulds for 4 to 15 mm glass, and answers trade questions about fit, materials and testing.
Ask the technical team